Friday, December 14, 2012

Cranberry & Chocolate Chip Cookies for Christmas Baking

 
As with some of my other new things to try, this recipe was what I call a Pinspiration!  When my sweet, fellow blogger friends over at Farm Chick Chit Chat decided we would host a Christmas Cookie Swap, I knew I'd need a new, Christmas"y" recipe to share.  Where do I turn when looking for new recipe ideas?  Well, Pinterest, of course!  

I found these amazing, Cranberry and White Chocolate Chip Cookies originally posted by averie cooks.  I knew right away this could very well be the Christmas cookie recipe I'd been looking for so I pinned it and after looking through many others, I came back to this one.  I'm so pleased to share it with you and hope you enjoy the crispy, yet ooey-gooey goodness this amazing recipe brings!  Be sure and make a huge double or triple batch like we did, you're going to want to share them!

I did make changes to the original recipe.  I added some healthier ingredients (YES! I know it's Christmas Cookies so I did leave much of the initial ingredients but I added in my own wheat flour, flax seed, wheat germ, replaced part of the sugar with raw honey, used UNbleached all purpose flour instead of bleached and they were STILL yummy!) Of course, I also only bake with our own farm fresh, free ranged lovely eggs so those were collected fresh that morning!  They ensure much better texture to baked goods I must say!

After making our version of these chewy, soft centered, yummy cookies, we decided to take two batches with us to our homeschool Christmas party.  They were just as big a hit there as they were at my house so I KNEW then I had my recipe for this swap!

Without further ado, enjoy the recipe! 

Cranberry & Chocolate Chip Cookies
Ingredients
(this is double the original creator's recipe so you may cut it in half should you choose)

1 cup unsalted butter, softened (2 sticks)
1/2 cup granulated sugar
1/2 cup raw honey
1/2 cup light brown sugar, packed
2 large eggs
4 tablespoons cream or milk (I used milk)
3 teaspoons vanilla extract
2 cups Unbleached All-Purpose flour
3/4 cup bread flour (all-purpose flour may be substituted and used exclusively; bread flour yields chewier cookies and is recommended)
3/4 cup Whole Wheat flour
1/4 to 1/2 cup Wheat Germ depending on your family's tastes (you may leave this out)
1/4 cup Ground Flax Seed (again, you may leave this out if it's not in your family's taste)
2 teaspoons baking soda
1/2 teaspoon salt, optional and to taste
1 cups dried cranberries
12 oz bag of semi-sweet chocolate chips ~ next time I am going to try dark chocolate chips so if anyone gives that a whirl, please come back and leave comments I'd LOVE to hear how that turns out!

Directions
1. Beat the butter on low speed until smooth. 
2. Add the sugars and beat on medium-high speed until creamed and well combined
 
3. Add the eggs, milk, vanilla, and honey and beat on medium-high speed until light and fluffy
4. Next, add the flours, wheat germ, flax seed (if using these two), baking soda, salt, and mix until just combined. 
 
5. Add the cranberries and chocolate chips, fold in by hand.
 
6. The original recipe called for you to, "Transfer dough to an airtight container and refrigerate for at least 3 hours, up to 5 days."
I did not have the luxury of the time for this so I put my dough in the freezer for about 20 minutes and it did fine.  You can decide how you'd like to chill your dough.
7. Preheat oven to 350°F, line your baking sheet with aluminum foil, parchment, or spray with cooking spray.
 
8.  Using a scant 1/4 cup measuring cup, place them on the baking sheet, spaced at least 2 inches apart. Bake for 8 to 10 minutes, or until pale golden and edges have just set, even if slightly undercooked in the center, as cookies will firm up as they cool (For crunchier cookies, extend baking time by 1 to 2 minutes).
9.  Allow cookies to cool on the baking sheet for 10 minutes before removing.
 
Storing & Freezing: Store cookies in an airtight container at room temperature for up to 5 days or in the freezer for up to 3 months. Alternatively, unbaked cookie dough can be stored in an airtight container in the refrigerator for up to 5 days, so consider baking only as many cookies as desired and save the remaining dough to be baked in the future when desired.
 
We hope you enjoy these delicious creations, we certainly did!  These cookies were part of our Family Advent Christmas Countdown Series.  If you'd like to read about other activities you can enjoy with your family during the holidays, try here.  If you try the recipe, try it and add your own twists, or new things, please leave us comments about it!  We really love to hear from you!  From the Burchell Family here at The Egg Basket and all of the families at Farm Chick Chit Chat, Happy Christmas Baking! 
 
Love & Blessings!
 
Tiffany

Advent Calendar Countdown~ Day 15 North Pole Breakfast

Advent Calendar Countdown~
Family Activities Day 25- Day 15


We have an Advent Calendar I sewed together for the kids last Christmas.  I'm NOT a seamstress by any means of the word, just self taught from books and tutes on other blogs.  I won't pretend our Advent calendar is the cutest (or has the straightest lines) out there but the kids seem to enjoy that I created for them - knots showing and all! <3 


I won't do a tutorial on how I made our calendar because it's only beautiful to us ha ha ;)  I will tell you if you're new to sewing and crafting with fabric like I am- just buy the wool felt and have fun with it!  The wool felt doesn't fray like other fabrics.  I just bought the wool felt in different colors to match my idea and then drew the squares and numbers by tracing and drew the little reindeer and tree shapes out and attached with stitch witch and sewed the edges.

In each pocket on the calendar I have slips of paper, on those slips of paper are fun activities, family nights, sweets, or holiday events for us to enjoy as a family.  The kids really enjoy these small treats each year and it gets us in the mood for a family oriented holiday season!

I'm obviously late getting the blog posts going for this year since we're already ten days into the month but I still wanted to share our ideas and activities in case someone else out there could enjoy them with thier own family!

I'll list what we've done so far and then hopefully find time to post the rest of our calendar frequently throughout the season to share with you!

So far this year in our countdown to Christmas we've enjoyed:

Day 25- We decorated the house together.  This is the first year that my mom has lived with us so going through our family's things AND her things together made it even more fun.  My kids laugh and call my mom's inlaw suite the "Winter Wonderland!"  Growing up, she was amazing during the holidays about decorating and bringing the holiday spirit into our home.  There was always Christmas music playing and the house would stay decorated in snowmen, miniature houses & shops, and other Christmas cheer from the day after Thanksgiving until the New Year.  I'm so pleased she's continuing it this year and that my children can enjoy it the entire season! 

Day 24- My dear husband treated us to dinner out at our favorite hamburger restaraunt, Red Robin.  Our actual Advent calender activity for the day was our local Christmas Parade.  After some farm incidents we were too late to find parking ANYWHERE in our downtown area.  Instead of having three sad kids, my husband decided to take us to dinner.  It was still a wonderful, fun Christmas activity AND I didn't have to cook or do dishes! :)

Day 23- Family Sweets- I found the kids some adorable Hot Cocoa mix packets at Target and put them together with some Cookies n' Cream chocolates.  Not EVERY Advent day has to be difficult.  Something as simple as a sweet treat, especially when they don't get them often, is just as exciting.  I believe it's simply looking forward to the surprise of what the day brings and knowing I took a little extra time thinking of them!

Day 22- My kids have miniature trees they set up in their bedrooms each year.  When they've outgrown ornaments a particular year, we'll go shopping for something new.  Last year they all decided to go with their own handmade ornaments and some colored balls they wouldn't outgrow.  We pulled their trees out on this day, decorated them, and set them up in their rooms.  It's much nicer than boring nightlights!

Day 21-  Baking Christmas Cookies!  We always carry food to our Christmas parties (for Day 6's Advent Activity) so the Day before usually is a Cookie or Desert baking day.  This year that falls on this day, Day 5.  We made the most DELICIOUS cookies from a recipe I found...of course...on Pinterest!  Let me just tell you it was AMAZING!  All of the moms raved over the recipe as did my family.  YUMMY!  If you're going to give a new cookie recipe a whirl this year, THIS is the one!  The cookies were Chocolate Chip & Cranberry and I blogged about them here

Day 20- Christmas Party!  We homeschool and are so very blessed to be members of a local homeschool co-op.  Our co-op celebrates each year together with a Christmas party.  This year, it fell on our Day 6.  It is ALWAYS a blessing, no matter where we have the party, to fellowship, eat, and enjoy the priorities of the season with our like-minded friends.  This year was even more fun as we held the party at a local roller skating rink.  Moms and kids alike had a fantastic time!

Day 19- Day 7 happened to fall on a Friday night.  If you haven't read my post about our Friday Night tradition, we make sure to spend each Friday evening together as a family with as little meal and clean-up time taken out of it as possible.  We always enjoy DiGornio pizzas (much less expensive than carry out or delivery) with a fun snack (often cookies made quickly from refrigerated dough) and we enjoy a Family movie together.  It's a tradition I pray we stick with even as the kids continue to get older.  For this movie night I decided I wanted to make it just a little more fun and create Grinch Drinks for everyone to go with thier snacks for the movie!  It was super simple and easy but the kids (and my mother) enjoyed it so much!  I found the idea on Pinterest as well as several other ideas for our Advent activities this year.  Here is the link

Day 18- Family Campout (indoors!) My kids still love to hang out with us and they REALLY love to do things outside of the norm.  As much as I dread sleeping on the couch ;), it makes them happy so one night of the Advent calendar is always spent "camping out" together in our living room AND staying up as late as they'd like, as long as they stay in the living room with us.  It usually involves a movie, lots of giggling, and talks we wouldn't normally have.  It also usually includes mom and/or dad being the first to fall asleep and being teased the next day! :)

Day 17- Jelly Belly jellybeans! :) I told you it's not extravagent or difficult! :) We love JB's and very seldom get them. This time of year, fun sweet treats are easy to find with all of the stocking stuffers out in the stores. I often will go through the stores a few days after Thanksgiving and pick up Advent items off of the stocking filler rows. Again, it's inexpensive but a fun little treat to look forward to.

Day 16- Christmas Movie Night!  This night is a special movie night of a Christmas movie that we watch all together.  Probably should be a classic but it's not.  This year we watched, "Santa Paws 2" together!  I surprised the kids and picked it up while I was out doing some shopping and we all sat and watched it together! Great little, feel good family movie! I recommend it for any families with kids :). 

Day 15- Today (well today when I wrote the post anyway) we had a North Pole Breakfast!  It was yet another idea I found on the amazing Pinterest website.  I made my usual pancakes for the kids, then used sliced strawberries and canned whip cream to create "Santa" cakes!  I used chocolate chips for his eyes and the very tips of the strawberries for his jolly red nose.  The canned whipped cream created his fuzzy hat border and tip and his fluffy, white beard.  Even my 11 year old son (who I thought might think he's too old for this) thought they were pretty cool! :)  With that we had some Hot Cocoa from my amazing Keurig (I don't know what I did before my dear hubby bought this convenient machine for me!) and sat down to eat with some Christmas music!  Another perk?  The chickens LOVED thier bowl of scraps including egg shells and strawberries!
 
We hope you've enjoyed sharing our Advent Calendar & Holiday Activities with us! We have many more activities to come as we enjoy the holidays and pray to spend the time loving each other and celebrating our family and praising our Lord Jesus Christ!  Please check back later for more Christmas Calendar Countdown Days and other ideas to add to your family's holiday.  Starting new traditions and maintaining them strengthen the family and leave your children with memories they can always cherish!  Many blessings from our home to yours!
 
Love,
 
Tiffany 

Wednesday, November 21, 2012

National Tie One On Day with Farm Chick Chit Chat

I'm so blessed to be a contributing author with an amazing group of Farm Chicks over at Farm Chick Chit Chat!  I can honestly tell you, they are creative, talented, compassionate, and plain old good ladies!  <3 

We're celebrating National Tie One On Day on November 21st at FCCC and running a contest for some beautiful aprons from our FCCC girls and contributors!  Head on over to celebrate with us and enter to win!


http://www.farmchickchitchat.blogspot.com/2012/11/tie-one-on-day-and-apron-giveaway.html

Pineapple Coconut Smoothies by Alyssa


 Pineapple Coconut Smoothies~Alyssa

It's cold outside but inside it's paradise!


Ingredients
2 and 1/2 cup of crushed pineapple
3/4 cup of coconut milk
3/4 cup of vanilla flavored yogurt
2 tbsp sweetened flaked coconut
1 and a 1/2 handful of ice

Directions
Blend all ingredients till smooth
Serve with additonal flaked coconut on top


 Now enjoy!


Tuesday, November 20, 2012

They're here! Incubating Eggs Day 1


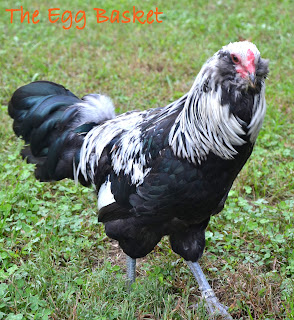
Samuel Little, Bantam Salmon Faverolle Cockerel
Incubating & Hatching Chicken Eggs
We ordered hatching eggs last week to continue working on our winter hatching program.  We'd already picked up our adorable Paint Silkies to start that project.  With this batch of eggs we're continuing with Porcelain, Patridge, Lavender, Buff, and White Silkies as well as some Bantam Salmon Faverolles (Poor Samuel Little needs some ladies to keep him company), and we're helping a young friend out by trying to hatch some of he and his Mom's first Japanese Bantam eggs. 

Since we just finished a hatch of Silkie eggs about 7 days ago, I need to first clean and disinfect our incubator.  We're using the Hovabator 1588 for this clutch.  I disinfect with a Clorox and warm/hot water mix (4 parts water/ 1 part Clorox) then rinse and dry.  Always, always clean and disinfect your incubator after hatches and I also like to clean and disinfect it one more time before putting new eggs in.  I'm a bit of a nut for biosecurity. 
Once I have the housework of it done, I set it up at a Temperature of 99.5 and humidity level of 50-55% for 24-48 hours BEFORE setting the eggs.  This ensures our eggs go into proper conditions.  I took this photo when I first set up the incubator, about 20 minutes into it being set.  As you can see, the temperature is still too low and the humidity was too high.  This gave me a chance to make adjustments PRIOR to jeopardizing the chicks' development.  If I already have the eggs, we keep them at room temperature and just ensure we rotate them (or be lazy and put them in the egg turner OUTSIDE of the bator like this time) until it's time to put them in.   That's what leads us to today! 
 
Hatching eggs should arrived packaged very securely if you're purchasing from another breeder.  If you're hatching your own eggs, you won't have to concern yourself with this part.  As you can see, this breeder does a thorough job of protecting the eggs from the jarring and tossing that happens to boxes during the mailing process. 
She also takes special care of the eggs inside of these bubble wrapped and filler surrounded (I've already removed the newspaper filler that kept the egg cartons from shifting around.  THIS type of care and concern is what I've grown to expect and love from my favorite breeders.  It's not only professional but it shows great pride in the chickens they raise and I know they want us to have a successful hatch almost as much as we do!  
Of course, next we carefully unwrap the eggs, notate the date and which eggs are there (breed, type, variety, condition, etc.) and I  mark each of the eggs with the breeder's initials if I'm incubating more than one breeder's eggs. This helps me keep track of which colors and chicks I hatch from each breeder for future use. I also use this information to track things like hatchability and any defects. All of this plays an important role in breeding if you're trying to improve the quality of your birds and not just breeding to do it.
 
I use an egg turner in my incubator, it makes the job of hatching easier because you won't have to turn them yourself.  We put our eggs gently in with the small (pointed end) down into the turner.  If you don't have an egg turner, you'll also need to mark an X and an O on opposite sides of your eggs.  You'll need to gently turn the eggs three times a day up until Day 18.  When you place the eggs in your incubator without a turner, you'll want to lay them on thier side and all of the eggs with either X or O facing up.  This helps you remember which eggs you've already turned during those three times a day. 
 I
 I then place my egg turner into my incubator and secure it properly.  I usually check on the eggs about every 30 minutes the first few hours.  Adding the eggs to the incubator and holding it open while you add them changes your temperature and humidity so you'll want to keep a close eye on that.  If the glass begins to accumulate drops of water on the underside of it (if you're using an incubator with a viewing area) then your humidity is TOO high.  Open some of the plugs found on it for ventilation.  I keep two thermometers and a hydrogmeter in our incubator to ensure I am accurately tracking my conditions.  If the humidity is too low or the temperature is too low, close those holes and/or add water.  This is why it's so important to have your settings correct before you start.  You'll have a better feel for your incubator and much more control over your new chicks' environment.  I never have any trouble checking the incubator this often- most of the time my kids are checcking even more often!  The big rule is, however, look all you want but LET IT BE!  If your conditions are right where they need to be- LEAVE IT ALONE! :)  It's hard for me so I realize it's tough for the kids but it's so important. 
 
Now that you're monitoring your clutch carefully- you are all set until Day 7 if you'd like to candle them!  Enjoy the anticipation!  The closer hatch day comes - 21 days from your first day of incubation- the more it feels like Christmas around here!  We'll be back around Day 7-9 to discuss candling!  
 
Love,
Tiff
 

Sunday, November 18, 2012

It's Showtime Part 3- Let's Go to the Show!

It's Showtime!
 
We're getting ready today to head out to the Virginia Poultry Breeder's Association 2012 Fall Poultry Show first thing in the morning!  The kids will be showing two chickens each and all three are participating in Showmanship again!  Their APA ABA Youth Poultry Club friends are mostly all showing tomorrow so it will be like an all day Chicken Play Date!  It doesn't get much better for them!  Snacks, Picnic, 800 or so Chickens, and hanging out with friends!  Mom is going to have a great time too!  We'll post photos later of our preparations, it's our largest show yet so the kids and I are thrilled and nervous at the same time!
 So, who are they taking to this show?

Chance is taking:
Jordan, his Blue Splash Silkie Cockerel

Jordan, his Splash Silkie Cockerel

And
Chipmunk, his Silver Ameraucana Pullet


Briana is bringing:
Samuel Little, her Bantam Salmon Faverolle

And
Lou, our Silver Ameraucana Cockerel
 
Alyssa is bringing:
 her La Fleche Pair,
Kyle, her Bantam La Fleche Cockerel

And

Katie, her Bantam La Fleche Pullet

The kids have been practicing their Showmanship both at home and at their APA ABA Youth Poultry Club Meetings.  All of the chickens are bathed, trimmed, and ready to go
 
Now it's my turn to do some work and pack us up for the show.  There will be vendors at the show I'm pretty certain but the food will most likely be more of the "fast food" variety which doesn't always sit well on kids with nervous tummies!  I'm going to pack some snacks and healthy lunches since it's likely going to be a long (exciting) day!  Fruits, Veggies, Larabars, LOTS of water bottles, Whole Grain fresh Chicken Salad Wraps, all things to sustain them and keep them well hydrated so they feel healthy and energized for all of the fun!  Of course, I'm also packing LOTS of hand sanitizer!
 

For the chickens:  cages, pine chips, scratch, and a gallon of water, these are always provided but you may want to take your own because it's madness when you coop in and I like to have ours readily available.  I prefer to keep our chickens on their normal diet, this eliminates any problems with stomach upset and I'm a freak about biosecurity.  With that in mind, I also bring paper towels and Oxine to clean the cages before putting our chickens in them.  The cages have been cleaned but as I said, I'm a biosecurity nut so I have my kids or I clean the cages ourselves just before putting our birds in.  We bring our pine chips- I don't want them getting sneezy or any upper respiratory issues right before seeing the judge- put those in along with some plastic or disposable cups (from home) with their food and water (again from home.) 

That has me packing: chicken feed (I put some in gallon size Ziploc bags), a jug of water, 2 small bowls (one for water, one for feed), pine chips, Oxine (or you can make a disinfectant with 1 part Clorox/ 4 parts water), paper towels, and baby wipes in my large recycled bag.  The baby wipes are to clean any poop or debris our chickens might get on them while waiting for the judges.  Chickens poop...A LOT ... and they really don't care if they step in it or not.  Featherlegs are particularly challenging in regards to keeping their feet clean so that's where baby/dog wipes work GREAT! 

 I think we're ready!  At dinner, we're going to quiz, quiz, and have some fun QUIZZING :)!  Dinnertime is great because my husband gets involved and the kids LOVE that!  Afterall, as a homeschooling mom, they get tired of listening to me quiz them on everything!  Dad makes it fun and it excites them for him to take an interest!  Wish us luck! <3
 
 If you love keeping up with the latest photos and chick news at The Egg Basket but haven't Liked us on Facebook yet, head on over and check us out! We're constantly posting and displaying new information and photographs so join us! We're going to try to upload photos from the show and our rankings!  I'll also post their results (even if there aren't any!) in a blog post next week!

Love,

Tiff 

Wednesday, October 31, 2012

It's Show Time Part 3- Preparing Chickens for the Show

It's Show Time! Part 3~
 
Preparing Chickens for the Show
 
 In our first poultry show post, we talked about showmanship, which is about preparing us/the kids for the show.  We're going to continue learning, studying and practicing for the showmanship portion up until the show and in between each show therafter.  The more you learn, the better you'll not only perform but the better chicken keeper/farmer you'll be. 


In our second poultry show post in this series we gave you some ideas about selecting which of your birds to take to the show.
 

Our competing chickens need to be prepared for the show also.  No, not by studying and asking them questions, of course!  We want to talk about testing your birds and bathing them and giving them their salon treatment!  We didn't paint their nails but we did help them to look amazing!

In order to participate, each registered bird is required to have Pullorum Testing.  My children were concerned because pullorum testing requires blood to be drawn with a needle.  Alyssa was particularly ansy because even learning about anatomy- chicken or otherwise- in our homeschool makes this poor baby nauseous.  Once it was over, however, we realized it was more of a concern for the kids than it was for the chickens! 

For the pullorum testing, it was pretty simple.  The tester gently lifted their wings and pricked them underneath with a needle.  She took a bit of blood and mixed it with an antigen and then awaited the results.  The kids helped out by holding towels under their wings until the bleeding stopped. 

Thankfully as suspected, all of our chicks tested negative.  The chickens then had a silver numbered band placed on their legs.  This seemed to irritate them much more than the blood test at first but they quickly seemed to adjust to the bands and now ignore them.  The kids each recieved their certificate for the negative tests.

Now that the chickens and children were all registered and ceritified, we needed to get them in thier best, tip-top show shape!  That required us to bathe and style them!  You'll want to bathe your chickens about 3-5 days prior to the show.  This gives their body time to work some of the natural oils back into their feathers.  It's much easier than it sounds, trust me.  Having never felt the need to bathe my chickens I was a little intimidated by the thought of angry, flapping chickens wanting nothing to do with water.  I was wrong!  It's so much easier than I pictured it and some seemed to enjoy it!
My Daughter, Bri wrote for this post! <3
My 9 year old daughter, B, wrote out the steps for bathing the chickens.  Here are her instructions.

To make your chick look nice before a chicken show,wash them good.  We filled three tubs. One with warm water and Dawn dish washing liquid, one with only water, and
one with water and vinegar. 


When you wash them you only put the water to their neck do not get their face in the water.  Do not scrub them, you move them back and forth in the water. You may gently rub them if you're careful not to push the feathers in the wrong direction.  You probably at least want to rub around their vent area.  Do the same with all of the tubs, wash them in the same order as when you filled the tubs.

Next, you wrap your chicken in a big towel (ensure you leave their heads out of one end) for a minute or two. Sit down with the big towel in your lap, hold them close to you but let their feet touch your lap so they dont panic as much. 

While you have your chicken wrapped in the towel, take the time to wash their legs, feet, and nails old toothbrush and trim their nails if needed. Rinse the soap off with your rinse bucket or running water. Ours did not need it so I apologize, we don't have photos of that. Please be careful when trimming the nails. You may want to have someone with experience help you or show you how the first time. As you can see from Jordan's photo, the feather leg chickens especially benefit from washing their feet. 

Find a plug outside your house then get an extension cord (if you have one) and plug a blow dryer into it. Blow dry them on the cool setting (make sure that it's not too hot). Wash your next chicken the same way. Our chickens enjoyed their bath and even drying experiences and I'm sure yours will too!
 
Keep in mind we prepared for this show when it was still warm/hot weather outdoors.  Now that Hurricane Sandy has passed through and brought cold weather here to Virginia, we will wash them in the house for our show in November.  We will follow the same steps but using warm water in the house.

There are some other tips/tricks to preparing your chicken for the show.  We change thier diet just slightly about a month before by adding Ultra Kibble to their food, it just seems to fill them out and help them feather nicely.  Many of our friends who show poultry also rub their feet and beaks with Vet Rx.  It helps them look nice and shiny :) and also helps prevent colds and Scaly Legs.  Both of these products are shown below in our Amazon store. 


Many serious poultry showers also cage their birds separate from the flock a few days before a show to keep them clean and in tip top shape.  We have not done this, our birds are so closely bonded with their flock, we decided not to do this out of fear of stressing them to much with the added stress of the show.  I do understand the reasoning, however, especially with our white silkie girl.  She seems to want to walk through any mud she can find as soon as she's bathed!

Our first show was fairly small, the show they're competing in on Nov. 17th is a big show so we may try separating them into clean caged areas once they are washed, especially those that went to the last show and weren't stressed by it.  I truly believe it helps that all of our chickens- layers, breeders, show chicks, pets are ALL handled often and still hand fed treats by the kids and I.  They trust us in their own chicken way to provide and care for them!

Alyssa will be adding to the next Show post about their experience at the show.  We'll cover some of the questions the judges asked them and what their personal thoughts were about the experience!  We look forward to posting again soon!

Love,

Tiff & Bri