Thursday, January 17, 2013

Mites! Preventing & Treating these nasty parasites!

We've been blessed to maintain a pest free farm using all natural preventatives, good husbandry, and healthy nutrition in the past.  Diatomaceous Earth, Garlic, and proper feather care have been our best friends in preventing external parasites.  The best way to deal with mites and louse is to never need to deal with them at all.  Unfortunately, even the most careful of us will fight this battle!  Since keeping your flock free from mites and louse is important in maintaining the overall health of your chickens, if you do suffer an infestation, you'll need to deal with it immediately. 

External parasites decrease egg production, weight gain, disease resistance, and food intake.  In a worst case scenario they can cause death in their host birds, especially in bantam varieties.   One of the more common parasites, bite the birds with piercing mouth parts that irritate their skin and cause feather damage. 

Katie enjoying a dust bath
Tiger, Holly, & Chipmunk having some scraps
Proper housing and nutrition can help your chickens avoid and overcome external parasites.  Cleaning your coops and runs regularly, using DE, and a consistent, healthy diet with some treats, and avoiding or at least reducing the traffic of others visiting your flock, and being attentive to your flock all work towards a solid preventative management program.  


One of the most important aspects of a pest prevention program is to inspect your birds DAILY.  Look closely and ensure they're behaving normally.  Part their feathers and look for feces or "dirt" on your chickens.  You'll often see this around their belly or tail.  Around their eyes, vent, crests (especially in silkies they love to get into their crests and around their eyes and beard) the chicken may appear dusty and dirty (dingy looking) from the casings.  If your birds have crusty eyes in the winter without any appearance of respiratory illness, look for pests!  If you suspect mites but don't see any, you may be dealing with the Red Chicken Mite which come out at night.  If that's the case, head out to your coop with a flashlight and check your birds after dark.

You'll notice (below) symptoms on this poor Silkie hen (we obtained from someone who did not maintain the quality of care she deserved).  Look at her eye- notice the yellow crust in the corner?  This is after I'd applied hot compresses to it.  Her crest is sparse and dingy as is her poor beard.  We were originally told this bird was in a molt so to expect her crest to be, "a little light."  This poor girl wasn't molting, she was suffering from a mite infestation and we were shocked, to say the least upon her arrival.  That, folks, is for another post, however.


Cleaning your coop regularly and keeping it sanitized is a huge deterrent.  Normally, we clean and sanitize the coops, removing all nesting materials, and being careful to clean well in corners and cracks.  I then add a layer of Diatomaceous Earth (often referred to as DE)  to the coop before reapplying the new nesting material (we use pine chip flakes.)  Just ensure that the DE you purchase is "Food Grade", it should state it on the label.

We always add DE inside their runs, coops and nesting boxes to help avoid the nasty bugs. DE is safe, effective, and environmentally friendly. The DE controls the northern fowl mites when applied externally. We've found it to be effective in fly control and other pests as well, especially in the hot, humid summer months here in Virginia.  

Dust bathing is one of your chickens' best defenses to maintaining good feather health and staying parasite-free.  It's an enjoyable experience for your chickens and great entertainment for their owners.  Our birds love to roll around coat their feathers in DE mixed in with some good, dry earth. It always amazes us to see just how much of it they tuck under their wings during their rolling. After they've coating themselves, allowing the dirt to asphyxiate the pests, they'll finish off by gathering feather oil and preening themselves and sometimes each other to spread that oil back on their feathers.  Ensure you provide your flock with space and material to dust bathe regularly. 

Flossie, Katie, Tiger, & Stella clucking happily over a sweet dust bath spot they found.
DE is also great to add to their feed.  We provide our chickens with the appropriate commercial feed for their age and mix in garlic as well as DE to help prevent mites.  Up until this recent incident, it's always worked for us in combination with the tips listed above. 

Now- what happens when you still manage to get mites?  In our case, Northern Fowl Mites?  First, remember, "It's okay."  I know it's upsetting, trust me!  In all this time I've been proud to say we have managed our flock well with organic and all natural products combined with good husbandry and never had a problem.  Unfortunately, it happens to the most careful of us.  We brought our mites back with us from another flock.  Yes, we quarantine but that's for another post.  This post is about dealing with the "situation" when you've done your job but the pests still get in.

First and foremost you still have to clean and sanitize your coops and runs.  Yes, I know, once you know the birds have mites, it's no fun.  My head felt itchy and I had the "creepy crawly" (as my kids would say) feelings on my arms the entire process until we were complete!  It's important to clean really well!    While our chickens were out free ranging, I cleaned and sanitized the coop and nest boxes being careful to hit the corners and crevices where the bugs like to hide really well .  One of the best products out there for sanitizing chicken coops, cages, and runs is Oxine.  We also use Oxine when we attend shows and I talk about it in my Poultry Show Series.


Once I was certain the coops and nest boxes were well cared for, it was time to put down my insecticide.  Make sure whatever insecticide you choose that it's safe and approved for a poultry population.  You can check with your local University or County Extension Poultry Specialist.  For us, this time instead of laying down DE after I'd cleaned, I sprayed ours well with Sevin.  You can also purchase the Sevin dust and sprinkle it throughout your coops. I know- I'm not a fan of chemicals, you'll know this but once I knew we had mites, I had to do what was necessary to responsibly care for our flock. I coated the walls, floors, roosts, every crack, crevice, and corner with the Sevin spray thoroughly   Then I waited for it to dry.  Even more fun is cleaning out the runs.  We raked and cleared the straw and pine shavings from each of our runs and followed up again with the Sevin insecticide spray while the chickens were OUTSIDE of the area free ranging.  I personally do NOT use the Sevin on my chickens or in the coop or runs when they are in there.  I know other breeders that do, it's just a preference for me.  I'm not a veterinarian nor chemist so I can only offer what we've personally tried for our flock. 


While the Sevin was drying, it was time to work on the birds.  You're going to want to clean your birds.  If it's cold outside like it is here, you're going to need time and space to dry them well.  It won't do any good to rid your babies of mites only to put them back outside wet and freezing for them to get sick or die.  We used the blue Dawn dish washing detergent on our birds.  Dawn has been used by farmers for generations to kill and rid their birds of nasty parasites like fleas, mites, and louse.  It worked well for us.  There are insecticide shampoos at pet stores and the vets office you may inquire about.  As I've said, the less chemicals the better and Dawn has worked well so we stuck with the old standby.  If you've never washed or bathed your birds before, you can learn how by reading Briana's post here.  The difference was I used Dawn and it's colder now so we took extra care in drying them.  You may not be able to dry them all so having a warm room or brooder to put them in while they finish drying for a few hours is most helpful.  It also gives you time to finish up with the nest boxes, coops, and runs. 

DE sprinkled in coop after Sevin has dried and starting to add the pine shavings
While my girls were drying the chickens, Chance and I went back out to finish their living quarters.  We added new DE back in the coop, nest boxes, and throughout the runs and topped it off with all new pine shavings for a clean, warm, pest-free area.  At this point, we were feeling much better about our farm area again. 

To better control the Frontline spray, I put it in a dropper for application.
Once the chickens were fluffy and dry- and beautifully clean- we used our insecticide that goes on the chickens.  We consulted with Dr. Peter Brown aka, "The Chicken Doctor" who has always been such a blessing to us and helped us with our flock.  He suggested the Frontline Spray for the treatment on our chickens.  It doesn't take much, only 4-8 drops depending on the size of your chicken.  We used a drop at the back of their head (in their crest but not too close to their eyes/face), a drop under each wing, a drop above their tail head, and a final drop below their tail head.  Be very careful not to get the medicine in or near the vent area.  Some breeders choose not to use Frontline on male breeders because there have been rumors of infertility in the males on Frontline.  We haven't experienced this problem, but again contact your vet or Dr. Brown for advice if you're unsure.

Katie towel drying while waiting for her turn under the blow dryer
Once the runs, coop, and nest boxes were all clean, sanitized and sprayed with the insecticide and the chickens were also clean, dry, and had received their treatment, they went happily back out to their living quarters.  Almost immediately they seemed perkier, scavenging around in their clean runs (making a quick mess of it right away!), chirping loudly to each other, and seeming to feel frisky all cleaned up.  I know I feel better and now don't have that creepy crawly feeling anymore!  I'm happy to say our hard work paid off and we are mite free again!  My plan is to use the treatment again in 30 days and then see where the weather and the birds take us from there.  I would love to go back to our holistic, natural husbandry methods and my goal is to do that, I just need to be certain that our flock is cared for properly and safe from re-infestation first.  I'm so delighted to be back to our "old selves" and our chickens healthy and comfortable! 

Love & Blessings,

Tiffany

Monday, January 14, 2013

Healthy, Real Food, Easy Honey Wheat Bread

As a wife and mom, eating healthy has always been important to me.  What my idea of eating healthy looks like has changed over the years as our lives have changed and I've grown and educated myself on what I believe is important for my family.

After being diagnosed with a rare autonomic dysfunction and heart disease in my 20s, I began researching and reading about what true healthy eating is.  I discovered that for our goals, it wasn't about the newest food fad or weight loss diet but about truly healthy food for nourishment, energy, and growth.

I realized we needed a more natural, homemade approach to our meals instead of the "sugar-free", "low-fat" processed foods marketed by the big food companies.  What I wanted was a sustainable mix of my Grandma's style and recipes combined with the current trends of local and/or organic foods and whole grains.  It was perfect, or at least the idea was perfect. 

There were some challenges and differences.  My grandma didn't home school, run a small chicken farm, she wasn't driving kids to martial arts, piano, and home school co-ops.  Life moves faster now.  She wasn't battling heart disease and dysautonomia.  However, she also didn't have the luxury of the Internet with amazing online resources to assist her. 

I'll not fib and tell you I have this "whole foods" thing wrapped up nice and neat.  What I will tell you is I do my best.  Do we have weeks when my body gives out on me and my dear, sweet, overworked husband gets stuck handling the meals?  Certainly!  Does he create real food, homemade meals from scratch after working all day and handling MY side of the responsibilities? Heck no!  Do we run late between our Thursday Co-op, chicken chores, and or mad dash to martial arts class?  Yep!  Do I panic and hit McDonald's (GASP!) sometimes when this happens?  Sadly, I'm guilty.  Do I let this hold me back any longer from trying to maintain a healthy, real food lifestyle on the other days? No way!

Life is life, it's unexpected and we just have to roll with it!  I have finally convinced myself that it's one step at a time and I can't take an all or nothing approach!  I AM learning ways to prepare myself and avoid those obstacles.  Cooking some of our favorite, whole food meals in double servings for freezing and taking advantage of our crock pot are two ways.

Finding my perfect, honey wheat, homemade, simple basic bread dough recipe and making it in triple batches is another way.  As a matter of fact, it's also my most tried and true tactic to keeping things "real."  I must admit baking my own bread was intimidating at first.  Rising?  Punching?  Yeast?  I was clueless in the beginning. 

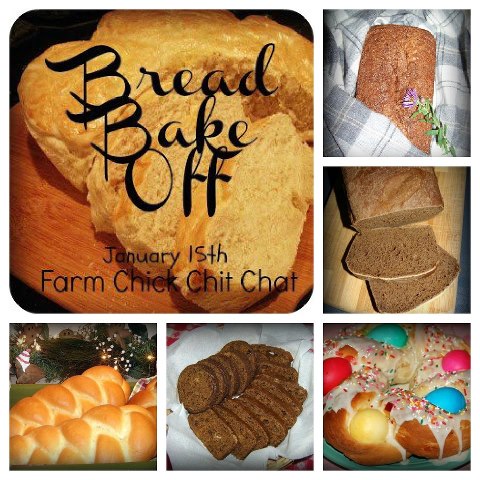
That's why THIS recipe, my friends, has become my honest to goodness stand by.  When the Farm Chick Chit Chat ladies all decided we would have a bread bake off, I knew without a doubt, this was the recipe I would share. 
It's real food, easy to make, easy to freeze & bake later, tastes delicious (even after freezing it!), a great starter bread for your other rolls and recipes, and it's user friendly.  Can you tell I'm proud of my bread?  It's been a big hit here, at friends' homes, at baby showers, and with family's I've taken meals to.  I generally make three loaves at a time and that lasts us approximately a week.  I also send frozen loaves back to college with my baby sister every time she's home visiting and I know she's at least getting some whole grains in her diet.  I love it! Okay, are you convinced to try it now?  Let's bake some bread!


The Egg Basket's Honey Wheat Bread

 
In a medium size bowl combine:
1 cup warm water (110-115 degrees F)
1 TBL milk
2 TBL Olive Oil (or coconut oil or any oil, I like the Olive Oil and it's heart healthy)
2 TBL Honey
2 TBL Brown Sugar
1 tsp Salt


In a large bowl, combine:
1 1/2 c. All Purpose unbleached flour
1 1/2 c. Whole Wheat Flour - + extra for kneading
1/3 c. Wheat Germ
3 TBL Flaxseed
2 tsp (1 packet) of Instant Active Dry Yeast

Create a well in the center and add your liquid ingredients.

Knead until the dough is smooth and elastic (about 10-15 minutes).  You may need to add extra flour to the dough if it's too sticky but be careful to just add a little bit at a time.  Place the dough in a greased bowl, turning once to grease both sides and cover with a clean towel.

Let the dough rise until doubled in a warm, draft-free spot (about 45 minutes).  I let mine rise in the microwave (do NOT turn on the microwave!) I find I know it's draft free even if the kids are running in and out of the house and the kitchen!

 
Punch down the dough after it's doubled and knead until smooth.  Form into a loaf.  Place the loaf in a greased loaf pan and cover again.  Let the dough rise in the pan in a warm, draft free place again until almost doubled in size (about 30 minutes).  Preheat your oven to 350 degrees.

 
Bake at 350 degrees for 30-35 minutes.  If the loaf starts browning too soon, you may lightly lay a piece of aluminum foil over the top. 

Remove the bread from the oven and let it rest in the pan for a few minutes.  After that, remove it to a wire rack and cover with a cloth.  It's best to store your bread in a cloth bag. 

For Freezing-
Make your dough, allow it to rise the first time, punch the dough down and knead it until elastic as above but instead of placing it in a loaf pan to rise a second time, add it to a freezer bag.  Try to get all of the air out of the bag, label it and place it in your freezer.  When you're ready to use the bread, take it out of your freezer the night before, place it in your refrigerator to thaw and rise the second time and then bake it as above.  It's that easy! 

I'd love to hear back from any of you that try the recipe and any tips, tricks you may have!  I hope your family enjoys it as much as mine does!

Love & Blessings!

Tiffany

Sunday, January 13, 2013

Farmers Love

Farmers maintain a special relationship with their livestock.  We provide for them, care for them, pat them, hold them when they're sick, help them from their shell when they're stuck during hatching, help them birth their calves, foals, be there as needed.  It can be our lively hood, hobby, or provide sustainable, healthy food for our friends, family, and neighbors' tables.  It's also more than that. 

There's a mutual love and respect for God's green Earth and beautiful creatures.  It can be hard to explain until you feel that warm earth in your hands with the sun beating on your back as you work your gardens and crops; or when you hear your first "I laid an egg" song from a pullet you've raised from hatch or even conception and your heart swells with pride.  You might do a happy dance in the  middle of the field or yard, you may call your father or grandmother and give them that smile from their own farmyard memories.  Just a warning, my friends, once you've felt it, there's no going back!  You're one of us, a farmer, a caregiver, a provider, and there's no going back!

Along with the companionship and nourishment we receive comes a lot of responsibility and strong commitment.  The sense of that varies in different degrees from farmer to farmer but to maintain a successful, healthy farm it must be there in good measure.  It doesn't matter if your farm is on a 1/4 acre lot in a city or on 100 acres in the country, any farmer worth their salt must have that something that drives them to get up at the crack of dawn or rooster's first crow and get the work done. In terms of livestock, we all know there's feeding, watering, providing medical care, housing, and safety from predators and harm.  It's hard work and a lot of it but it's oh so worth it!  We're always learning, striving for improvements, talking to each other, and working some more! 
We're starting a series on The Egg Basket blog about taking care of the poultry on our farm- the chickens.  I'll be blogging about some recent events that set us back, made us catch our breath, and realize just how much this farming thing means to us.  We've had to work harder than ever to save our little chicken farm and get it running back on track in the healthy, sustainable way we feel God intended and with that learned some things on care and health and a lot more things on what's important and how to protect ourselves and our flock. 

I want to share those things with our readers and friends.  I want to be real and not hide our challenges.  Things go wrong on a farm, things break, you meet less than honorable people, predators test your boundaries.  What we've learned is it's important how you handle the challenges and prevent them from happening in the future. 

We don't want to hide the hardships or the struggles from our readers.   We want to share them, discuss them, and learn from each other.   If our difficulties can assist or prevent another farm family then why not share the knowledge we've accumulated? 
When I was a little girl it was common to watch as other farmers came by my father's farm to talk about the cattle or the drought or come asking for help to round up a stallion that had jumped the fence.   There is a community of folks in farm life, the only difference is now we're not limited to our next door neighbors.  Thank God because now it's hard to always have neighbors that have the farm love that I mentioned above.

 Not everyone understands the need for small scale and family farms and the sense of joy and accomplishment that comes with them.  We do have the Internet and our circle of online friends and co-farmers to share with so that's what we intend to do!   Stay tuned to learn what we learned the hard way and I pray it may help you with your own flocks.

Love & Blessings,

Tiffany  

Monday, January 7, 2013

Photos & Keeping Up with Us

If you don't follow us on Facebook (which really you should :) I recently realized you're missing out on news of our latest hatches, meeting our incoming flock members, and updates. 

Well, that's just not fair, is it?  One of my goals for the New Year is to be more diligent in updating the blog as much as Facebook so everyone enjoys all of The Egg Basket's happenings and cuddly new hatches.  I don't want to show favortism to the Facebook folks, right?

We're hatching and raising chicks like mad folks around here ramping up for Spring chick orders and all of those exciting Spring Poultry Shows!  The kids and I are beating the winter blues with adorable fluff balls and sweet chirpings!

We've had a Silkie Invasion here at The Egg Basket!  If you follow us on Facebook, :) you already know I'm a sucker for a silkie but if you don't, I'm a SUCKER for a Silkie!  I'm completely in love with this breed!  Great look, personality, temperment and prolific layers in our experience, gotta love this bird! 

We've picked up several new roosters, hens, and pullets in different silkie varieties.  (Remember, varieties are the different color variations in a breed.)
Meet Jackie!  Jackie is a 6 month old Splash Silkie pullet.  She's just as sweet as can be and enjoys cuddling!  We saw Jackie with her detailed splash markings and had to have her to pair up with Jordan, our Splash Silkie cockerel.  They are already doing their thing and even with the cold, dark days, Jackie's chirping happily and starting to lay beautifully for us while Jordan stands guard protectively at the doorway to their run. 
 
Welcome to one of my Christmas presents, thanks to a sweet and amazing husband!  He purchased me an amazing Show Quality Porcelain Silkie quad to add to our Silkie brood here.  Flossie, Edith, and Sebastian are about 18 months old and have been together for over a year now.  Their bond is unmistakeable.  They are all in molt currently so you'll have to excuse the hens' bad crest day!  Stevie, is a 1 year old hen who's being adding in with this porcelain trio to make it a quad.  Stevie just placed Best in Breed in last month's Poultry Show!  I'm so excited for this gift!  Flossie & Edith are laying beautifully from the first day in our home, it's interesting to watch them brood each other's eggs!
As you can see from Flossie's photobomb here, she does NOT want me disturbing either of their eggs!
We've also added to our Black Silkie pen with a great looking black rooster, Blake and a stunning little pullet named Black Beauty.  Miranda is happy as are the other black pullets now under Blake's watchful eye.  As far as silkies go, I've never had one as wonderfully protective and careful as Blake is.  Blake's tight wings, perfect toe spacing, green sheen in his black feathers, and heavily-feathered feet make him a real gem.   Black Beauty still has some growing to do at only 6 months old but already has an adorable crest and a nice black sheen. Black Beauty has adjusted well and taken to Ninja and Miranda right away.  The ladies spend much time preening each other and Blake and staying in a close knit group even when free ranging. 

As I  mentioned, we're hatching babies galore, most of which have been silkies.  Our silkie lines have grown and we've included some of the best lines in the country to add to our Spring laying pullets.  Here are just a few of the new darlings.


Outside of our silkies, our other breeds are growing and working hard as well!

 
We're hatching Bantam Salmon Faverolle chicks as well and I'm absolutely thrilled with the results.  They're such a great breed for flocks with children and such a gorgeous ornamental chicken!  The feathered feet on our five toed beauties are developing so nicely!  We can't wait to offer these sweethearts to our readers come Spring!

 
Chance & Briana are working together now on some Bantam Polish and Chance added a White Crested Blue Polish Rooster named Flash and our girls surprised us all at how easy they welcomed him.  Flash is a year old and our young pullets seem happy to have a man in their flock.  Eleanor, our 7 1/2 month old pullet has been especially happy, snuggling up as close as she can in their coop at night with Flash.
Of course, we still have our Golden Lakenvelders, Bantam La Fleche, Silver Ameraucanas, and other Silkie varieties we're tending to and preparing to meet your Spring Chick and Fertilized egg needs.  I hope you've enjoyed meeting some of our newest additions and getting caught up on the happenings here at The Egg Basket.  In keeping with my New Year's resolution to update our blog readers more, I look forward to chatting with you very soon on more updates!  Check back with us soon!

Love & Blessings,

Tiffany

Friday, December 14, 2012

Cranberry & Chocolate Chip Cookies for Christmas Baking

 
As with some of my other new things to try, this recipe was what I call a Pinspiration!  When my sweet, fellow blogger friends over at Farm Chick Chit Chat decided we would host a Christmas Cookie Swap, I knew I'd need a new, Christmas"y" recipe to share.  Where do I turn when looking for new recipe ideas?  Well, Pinterest, of course!  

I found these amazing, Cranberry and White Chocolate Chip Cookies originally posted by averie cooks.  I knew right away this could very well be the Christmas cookie recipe I'd been looking for so I pinned it and after looking through many others, I came back to this one.  I'm so pleased to share it with you and hope you enjoy the crispy, yet ooey-gooey goodness this amazing recipe brings!  Be sure and make a huge double or triple batch like we did, you're going to want to share them!

I did make changes to the original recipe.  I added some healthier ingredients (YES! I know it's Christmas Cookies so I did leave much of the initial ingredients but I added in my own wheat flour, flax seed, wheat germ, replaced part of the sugar with raw honey, used UNbleached all purpose flour instead of bleached and they were STILL yummy!) Of course, I also only bake with our own farm fresh, free ranged lovely eggs so those were collected fresh that morning!  They ensure much better texture to baked goods I must say!

After making our version of these chewy, soft centered, yummy cookies, we decided to take two batches with us to our homeschool Christmas party.  They were just as big a hit there as they were at my house so I KNEW then I had my recipe for this swap!

Without further ado, enjoy the recipe! 

Cranberry & Chocolate Chip Cookies
Ingredients
(this is double the original creator's recipe so you may cut it in half should you choose)

1 cup unsalted butter, softened (2 sticks)
1/2 cup granulated sugar
1/2 cup raw honey
1/2 cup light brown sugar, packed
2 large eggs
4 tablespoons cream or milk (I used milk)
3 teaspoons vanilla extract
2 cups Unbleached All-Purpose flour
3/4 cup bread flour (all-purpose flour may be substituted and used exclusively; bread flour yields chewier cookies and is recommended)
3/4 cup Whole Wheat flour
1/4 to 1/2 cup Wheat Germ depending on your family's tastes (you may leave this out)
1/4 cup Ground Flax Seed (again, you may leave this out if it's not in your family's taste)
2 teaspoons baking soda
1/2 teaspoon salt, optional and to taste
1 cups dried cranberries
12 oz bag of semi-sweet chocolate chips ~ next time I am going to try dark chocolate chips so if anyone gives that a whirl, please come back and leave comments I'd LOVE to hear how that turns out!

Directions
1. Beat the butter on low speed until smooth. 
2. Add the sugars and beat on medium-high speed until creamed and well combined
 
3. Add the eggs, milk, vanilla, and honey and beat on medium-high speed until light and fluffy
4. Next, add the flours, wheat germ, flax seed (if using these two), baking soda, salt, and mix until just combined. 
 
5. Add the cranberries and chocolate chips, fold in by hand.
 
6. The original recipe called for you to, "Transfer dough to an airtight container and refrigerate for at least 3 hours, up to 5 days."
I did not have the luxury of the time for this so I put my dough in the freezer for about 20 minutes and it did fine.  You can decide how you'd like to chill your dough.
7. Preheat oven to 350°F, line your baking sheet with aluminum foil, parchment, or spray with cooking spray.
 
8.  Using a scant 1/4 cup measuring cup, place them on the baking sheet, spaced at least 2 inches apart. Bake for 8 to 10 minutes, or until pale golden and edges have just set, even if slightly undercooked in the center, as cookies will firm up as they cool (For crunchier cookies, extend baking time by 1 to 2 minutes).
9.  Allow cookies to cool on the baking sheet for 10 minutes before removing.
 
Storing & Freezing: Store cookies in an airtight container at room temperature for up to 5 days or in the freezer for up to 3 months. Alternatively, unbaked cookie dough can be stored in an airtight container in the refrigerator for up to 5 days, so consider baking only as many cookies as desired and save the remaining dough to be baked in the future when desired.
 
We hope you enjoy these delicious creations, we certainly did!  These cookies were part of our Family Advent Christmas Countdown Series.  If you'd like to read about other activities you can enjoy with your family during the holidays, try here.  If you try the recipe, try it and add your own twists, or new things, please leave us comments about it!  We really love to hear from you!  From the Burchell Family here at The Egg Basket and all of the families at Farm Chick Chit Chat, Happy Christmas Baking! 
 
Love & Blessings!
 
Tiffany